Ocean Glitter Resin Tray for Coastal Decor
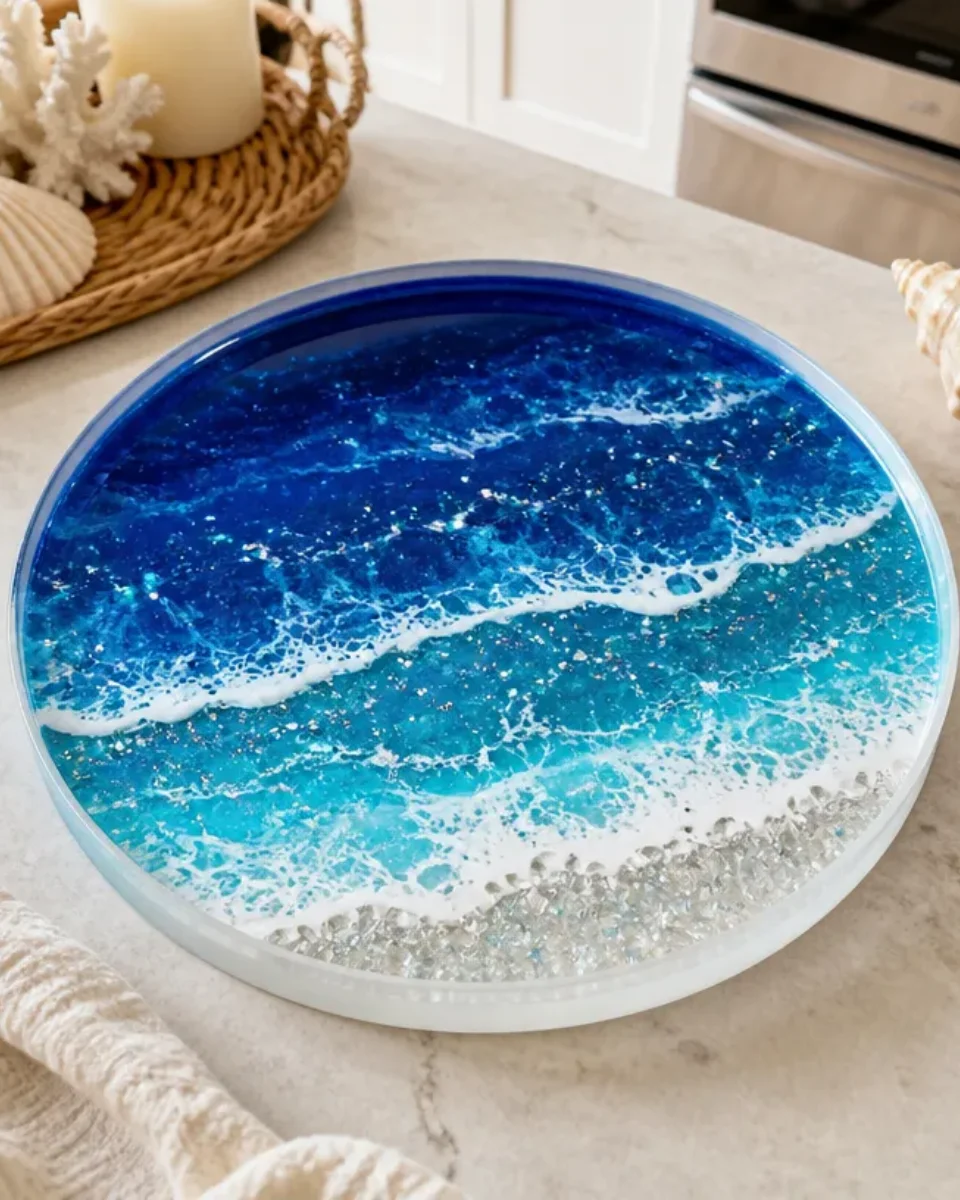
Creating décor that reflects the beauty of the coast can bring a serene feel to any space. In this project, you’ll learn how to make an Ocean Glitter Resin Tray, which is not only visually striking but also practical for serving or displaying items. With its shimmering, ocean-inspired design, this tray can be a stunning centerpiece for your coffee table or a charming addition to your coastal-themed décor. You may also find Diy Coastal Resin Tray Ocean Inspired Decor useful.
By using layers of resin and glitter, you’ll achieve a beautiful finish that captures the essence of ocean waves. Let’s dive into the project and start crafting something beautiful! You may also find Diy Artificial Sea Glass Vase For Coastal Decor useful.
Why You’ll Love This Project
This Ocean Glitter Resin Tray is not just a beautiful piece; it offers several inspiring benefits: You may also find Diy Glittering Crystal Icicle Ornament For Winter Decor useful.
- Visually Stunning: The sparkle of resin combined with ocean-themed elements can create an eye-catching centerpiece for your home.
- Customizable: You can tweak the color and glitter to match your personal aesthetic or home décor.
- Fun to Make: The process of pouring resin and layering colors can be a satisfying and therapeutic experience.
- Practical Use: This tray isn’t just for aesthetics; it can serve food, hold keys, or display decorative items.
- Makes a Thoughtful Gift: Handmade items always carry a special touch, making this tray a perfect gift for friends or family who love coastal decor.
Before You Begin
Before starting on the Ocean Glitter Resin Tray, it’s essential to prepare your work area. Make sure to protect your surfaces with a drop cloth and work in a well-ventilated space. The process can get a bit messy, so have wipes or paper towels handy for quick clean-ups. Also, organize your materials to ensure you have everything you need at arm’s reach, including the resin and molds. You may also find Diy Sea Glass Mosaic Mirror For Coastal Wall Decor useful.
You may also find Sea Glass Candle Holder Diy For Coastal Decor useful.
Materials You’ll Need
- Resin this will form the base and give the tray its glossy finish.
- Hardener required for curing the resin to a solid state.
- Glitter use ocean-themed colors to replicate the look of shimmering water.
- Silicone mold the shape of the tray will be formed within this mold.
- Mixing cups and sticks for combining the resin and hardener, and for adding glitter.
- Protective gloves always wear gloves when working with resin to protect your skin.

Tools
- Heat gun useful for removing bubbles from the surface of the resin.
- Scale to measure exact amounts of resin and hardener if specified by the product instructions.
How to Make the Project
Step 1: Prepare the Mold
Start by cleaning your silicone mold thoroughly to ensure there are no dust particles or residues which can affect the adhesion of the resin.
Step 2: Mix the Resin and Hardener
Following the manufacturer’s instructions, measure out the appropriate amounts of resin and hardener into separate mixing cups. Pour them into a larger cup and stir with a mixing stick for at least 2-3 minutes until they are well-combined.
Step 3: Add Glitter
Once mixed, begin adding your glitter. You can mix different colors to give an ocean wave effect. Pour the resin mixture into the mold slowly, allowing it to fill evenly.
Step 4: Use a Heat Gun
As the resin begins to set, gently pass a heat gun over the surface to eliminate any bubbles that may have formed during mixing. This helps achieve a smooth finish.
Step 5: Let It Cure
Allow the resin to cure fully according to the manufacturer’s instructions, often around 24 hours or longer depending on the specific product used.
Step 6: Demold and Finish
Once the resin is fully cured, carefully remove the tray from the mold. If necessary, you can sand down rough edges or add an additional layer of clear resin for extra shine.
Tips for the Best Result
- Temperature Control: Ensure that your workspace isn’t too cold or too hot, as this can affect the curing process and final appearance.
- Experiment with Layers: Consider pouring a base layer first, allowing it to set slightly, then adding additional layers for dimension.
- Avoid Overmixing: While it’s important to blend resin well, overmixing can introduce air bubbles; be gentle during your mixing process.
- Seal the Edges: If you notice any edges lifting after demolding, a thin layer of clear resin can help seal things up beautifully.
Customization / Variations
Feel free to experiment with various types of glitter or even incorporate small shells or decorative stones for a more tactile beach effect. You can also try different shapes and sizes of molds to suit your needs.
Ideas for Styling Your Handmade Decor
The Ocean Glitter Resin Tray can be used in various ways around your home:
- Coffee Table Centerpiece: Use it to display seasonal decor items or coffee table books.
- Dining Table Use: Serve snacks at your next gathering or display candles for a cozy atmosphere.
- Gifting: Wrap it up as a thoughtful gift for beach lovers or anyone who appreciates handcrafted items.

Frequently Asked Questions
Can I use food items on the resin tray?
Yes, resin trays can be used for food, but ensure the resin you use is food-safe. Always check the manufacturer’s instructions.
How do I clean the resin tray?
Wipe the surface with a soft cloth. Avoid abrasive cleaners that could scratch the surface.
Can I create different shapes for the tray?
Absolutely! You can use various silicone molds to create different shapes that fit your style.
What if I mix the resin wrong?
If you happen to mix the resin and hardener incorrectly, it may not cure properly. Always double-check ratios and instructions before starting.
Conclusion
In creating your Ocean Glitter Resin Tray, you’ve crafted a beautiful piece that captures the spirit of coastal life. Its shimmering surface and functional design make it a delightful addition to any home. Plus, customizing it can give you endless creative possibilities for display or gifting. Whether you choose to showcase it on a coffee table or use it practically in your daily life, this tray is sure to bring a bit of the beach into your space.
For unique gift ideas, consider browsing the charming selection of Sea Turtle Resin Tray. Additionally, if you’re interested in exploring more options for handmade trinkets, check out the variety available on Etsy.

Ocean Glitter Resin Tray
Ingredients
Method
- Start by cleaning your silicone mold thoroughly to ensure there are no dust particles or residues which can affect the adhesion of the resin.
- Following the manufacturer’s instructions, measure out the appropriate amounts of resin and hardener into separate mixing cups.
- Pour them into a larger cup and stir with a mixing stick for at least 2-3 minutes until they are well-combined.
- Once mixed, begin adding your glitter. You can mix different colors to give an ocean wave effect.
- Pour the resin mixture into the mold slowly, allowing it to fill evenly.
- As the resin begins to set, gently pass a heat gun over the surface to eliminate any bubbles that may have formed during mixing.
- Allow the resin to cure fully according to the manufacturer’s instructions, often around 24 hours or longer depending on the specific product used.
- Once the resin is fully cured, carefully remove the tray from the mold.
- If necessary, you can sand down rough edges or add an additional layer of clear resin for extra shine.