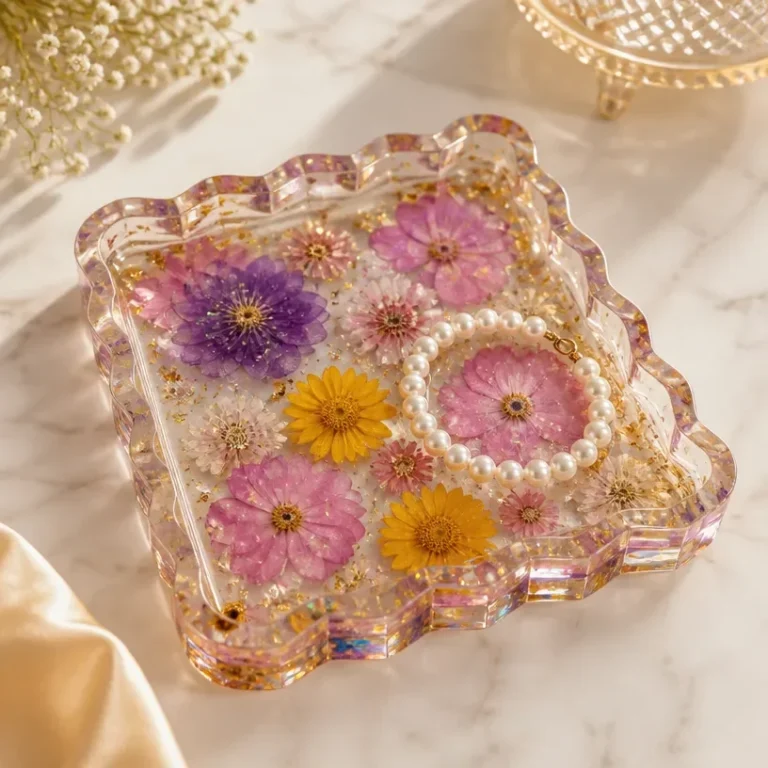
Handmade Botanical Coasters with Dried Flowers
Creating beautiful, functional objects can greatly enhance your home decor. These handmade botanical coasters, adorned with dried flowers, offer a unique and aesthetic touch to your living space. Not only are they visually appealing, but they also protect your surfaces from water stains, making them both a beautiful and practical addition to your home. You may also find Diy Pressed Flower Coasters Handmade Floral Decor useful.
These coasters can be displayed on a coffee table or gifted to friends and family, perfect for any occasion. The blend of natural elements in your coasters will reflect your personal style and appreciation for handmade items. You may also find Preserved Flower Coasters Handmade Floral Coaster Set useful.
Why You’ll Love This Project
Simple and Elegant Design
These botanical coasters stand out with their natural beauty, allowing you to use various flower combinations that reflect your taste and seasonal preferences. You may also find Diy Beaded Butterfly Suncatcher With Pony Beads useful.
Customizable and Unique
You can select flowers that resonate with you, creating a set that is uniquely yours. This makes them perfect for seasonal decorating or as personalized gifts.
Practical Use
These coasters serve a dual purpose: they protect your furniture while also adding a decorative flair. The durability of resin ensures they last, keeping your home stylish and neat.
Inexpensive Materials
With readily available materials, including dried flowers and resin, this project is both affordable and achievable for anyone looking to add a touch of nature to their decor.
Gift Potential
These coasters can make lovely, thoughtful gifts. Consider creating a personalized set for weddings, birthdays, or housewarming events. For more inspiration on unique handmade gifts, check out this botanical wreath project.
Before You Begin
Before diving into this project, there are a few useful preparations to keep in mind:
- Protect Your Surface: Lay down a protective covering on your work area because resin can be messy.
- Organize Materials: Have all necessary materials at hand to streamline the process and avoid interruptions.
- Prep Your Flowers: Ensure the flowers you plan to use are pressed and dried thoroughly, as moist flowers can ruin the finish.
- Ventilation is Key: Make sure your workspace is well-ventilated when working with resin.

Materials You’ll Need
- Dried flowers select your favorite flat blooms or leaves for a beautiful display.
- Clear epoxy resin this creates a durable and transparent finish for your coasters.
- Measuring cups to mix the resin and hardener accurately.
- Stir sticks for mixing the resin components.
- Silicone mold to shape your coasters in the desired size.
- Protective gloves to keep your hands safe while working with resin.
- Masking tape for securing your mold in place and preventing spills.

Tools
- Craft knife ideal for trimming flowers if necessary.
- Drop cloth to cover your work area and catch any mess.
- Scale to weigh ingredients for precise resin mixing.
How to Make the Project
Step 1: Prepare Your Flowers
Begin by selecting and arranging your pressed flowers on a flat surface. Ensure they fit nicely within your silicone mold, as this will affect how they appear in the final product.
Step 2: Mix the Resin
Following the manufacturer’s instructions, mix the resin and hardener in a clean container. Stir thoroughly to ensure an even mixture that will cure properly.
Step 3: Secure the Design
Pour a small amount of mixed resin into the mold to create a base layer, then place your dried flowers on top. Gently press them down to ensure they are well-embedded in the resin.
Step 4: Add More Resin
Once your flowers are positioned, pour additional resin over the top until the mold is filled. Ensure that there are no air bubbles trapped around the flowers. If bubbles appear, you can gently use a heat gun to disperse them.
Step 5: Allow to Cure
Let your coasters cure in a dust-free environment for the time recommended by the resin manufacturer. This typically takes 24 to 48 hours.
Step 6: Demold and Finish
After the coasters are fully cured, carefully remove them from the mold. If there are any sharp edges, use a craft knife to trim them for a smoother finish.
Tips for the Best Result
- Flower Placement: Experiment with different flower arrangements before sealing them in resin.
- Avoid Overfilling: Don’t pour too much resin at once to prevent overflow and maintain an even surface.
- Sanding: If necessary, lightly sand the edges of your coasters after demolding for perfect edges.
- Finish with a Coat: For an ultra-glossy finish, consider applying an additional layer of resin after the coasters are demolded.
Customization and Variations
Feel free to customize your coasters with various flower types, colors, and even embellishments like glitter or beads for a unique touch. Seasonal variations can also add an exciting aspect, using autumn leaves for fall coasters or bright flowers for spring.
Ideas for Styling Your Handmade Decor
These coasters can be paired with matching decor items, such as floral element trays or centerpieces. You can also display them on a decorative stand when not in use, showcasing their beauty as art pieces. For another delightful project idea, consider creating ocean-themed coasters for a different vibe to your table decor.
Care and Storage
Keep your botanical coasters looking beautiful by avoiding prolonged exposure to moisture and wiping them gently with a soft, damp cloth. Store them in a cool, dry environment away from direct sunlight to maintain their vibrant colors.

Frequently Asked Questions
Can I use fresh flowers instead of dried ones?
Fresh flowers contain moisture, which means they won’t maintain their beauty in resin. Always opt for dried blooms.
How can I fix air bubbles in the resin?
If bubbles form, you can lightly heat the resin with a heat gun to pop them. Take care not to overheat the resin.
What if my coaster sticks to the mold?
If the resin sticks, you can gently flex the silicone mold to release it, or use a craft knife to carefully separate it.
Can I use these coasters for hot drinks?
It’s best to avoid using these coasters for very hot drinks, as extreme heat can potentially damage the resin.
How should I store my coasters?
Store them flat in a cool, dry place away from direct sun to preserve both the resin and the colors of the flowers.
Is this project suitable for beginners?
Yes! This project is approachable for all skill levels, and it’s a great introduction to working with resin.
Conclusion
In this project, you’ve learned to create beautiful handmade botanical coasters featuring dried flowers. The elegant finish not only enhances your home decor but also provides a practical item you can enjoy daily or gift to loved ones. For unique ideas and designs, consider checking out Resin Flower Coasters on Etsy or explore more tips on crafting DIY resin coasters with dried pressed flowers.

Botanical Coasters
Ingredients
Method
- Prepare your flowers by selecting and arranging pressed flowers on a flat surface.
- Ensure the flowers fit nicely within your silicone mold.
- Following the manufacturer’s instructions, mix the resin and hardener in a clean container.
- Pour a small amount of mixed resin into the mold to create a base layer, then place your dried flowers on top.
- Gently press the flowers down to ensure they are well-embedded in the resin.
- Pour additional resin over the top until the mold is filled, ensuring no air bubbles are trapped.
- Use a heat gun to disperse any bubbles if needed.
- Let your coasters cure in a dust-free environment for 24 to 48 hours, as recommended by the resin manufacturer.
- Carefully remove the coasters from the mold after curing.
- Trim sharp edges with a craft knife for a smoother finish.