

Creating a beautiful and personalized crystal monogram ornament is an exciting way to add a touch of elegance to your holiday decor. This stunning glass keepsake will not only enhance your festive atmosphere but also serve as a thoughtful gift for loved ones, making it a delightful addition to any home. Whether hung on a Christmas tree or displayed in a window, the sparkling facets of the crystal will catch the light beautifully, creating enjoyable reflections throughout your space. You may also find Personalized Crystal Monogram Ornament useful.
In this guide, you’ll discover how to make your very own personalized crystal monogram ornament, perfect for adding a unique flair to your seasonal decorations. The combination of creativity and the use of quality materials promises a finished project that you can be proud of, similar to other decorative pieces like a crystal beaded Christmas ornament.
Why You’ll Love This Project
Creating your own personalized crystal monogram ornament has several benefits that make it a worthwhile endeavor: You may also find Diy Personalized Crystal Letter Ornament useful.
- Unique Design: Personalization adds a special touch that distinguishes your ornament from store-bought versions.
- Skill Development: Engage in a creative craft that helps refine your DIY skills, making this an ideal project for both beginners and seasoned crafters.
- Presentation Potential: This ornament serves as a beautiful decoration during the holidays, making it a centerpiece in festive settings.
- Memorable Gift Option: It’s a heartfelt gift idea that can be tailored to anyone’s initials, perfect for family and friends during special occasions.
- Affordable Elegance: With relatively inexpensive materials, this project delivers an impressive finished product without breaking the bank.
Before You Begin
Preparing your workspace is crucial for a smooth crafting experience. Make sure to protect your surfaces with a drop cloth or newspaper to catch any accidental spills or adhesive. Gather all your materials beforehand and ensure your glass surfaces are clean to enhance the final appearance of your ornament. You may also find Diy Crystal Firework Ornament Christmas Decor useful.
Materials You’ll Need
- Clear acrylic ornament base – forms the foundation for your design.
- Crystal beads – add a sparkling touch and enhance the light reflection.
- Personalized monogram letter – choose a flat, printed letter to represent the initials.
- Transparent adhesive – secures your design elements to the ornament.
- Ribbons or twine – for hanging your ornament stylishly.

You may also find Diy Crystal Glass Suncatcher Hanging Window Decor useful.
Tools
You will need the following tools to complete your ornament:
- Scissors – for trimming ribbons or twine.
- Craft knife – to cleanly cut or adjust the monogram if needed.
- Tweezers – to place small beads precisely.
How to Make the Project
Step 1: Prepare the Acrylic Base
Start by ensuring your clear acrylic ornament base is clean and free of any dust. This will help the design to adhere more effectively.
Step 2: Arrange the Crystal Beads
Lay out your crystal beads and decide on a design. You might want to start with a pattern around the edges or create a cluster effect.
Step 3: Secure the Monogram Letter
Apply a small amount of transparent adhesive to the back of the printed monogram letter before placing it firmly on the acrylic base. Make sure it is centered and aligned properly.
Step 4: Attach the Beads
Use tweezers to pick up the crystal beads and place them around the monogram. It’s best to secure a few beads at a time with adhesive, allowing some time for the glue to set before moving on to the next area.
Step 5: Final Touches
Once everything is securely in place and the adhesive has dried, take a moment to trim any excess ribbon or twine to the desired length.
Tips for the Best Result
- Consistent Placement: When adhering the beads and letter, maintain an even spacing for a professional look.
- Patience with Adhesive: Allow each layer of adhesive sufficient time to dry before moving onto the next part of the ornament, ensuring stability.
- Experiment with Colors: Try different color palettes for your beads to match your holiday themes or personal preferences.
Customization Options
Feel free to customize your ornament further! Experiment with different colors of crystal beads, and try incorporating other decorative elements, such as dried flowers or seasonal motifs, for added personality.
Ideas for Displaying Your Finished Project
Your finished personalized crystal monogram ornament can be hung on the Christmas tree, added to holiday garlands, or even displayed in a window where it will shine in the sunlight.
Another option is to present it as a thoughtful gift. Consider pairing it with a set of other personalized treasures or festive items for a delightful holiday package.

Frequently Asked Questions
Can I use a different type of adhesive?
Absolutely! Just make sure it’s clear-drying to avoid noticeable residue.
How should I handle the crystal beads?
Use tweezers when placing the beads for better control and precision, especially with small pieces.
What if my ornament base is scratched?
You can often buff out minor scratches with a soft cloth and a bit of glass polish.
Is it safe to use this ornament outdoors?
If the ornament has been sealed properly, it can be displayed outdoors temporarily, but avoiding direct exposure to extreme weather conditions is ideal.
Conclusion
In this project, you’ve learned how to create a stunning personalized crystal monogram ornament that embodies both beauty and thoughtfulness. Once completed, this keepsake enhances your holiday decor with its unique flair. For more personalized gift ideas, consider exploring Things Remembered: Personalized Gifts & Keepsake Gift Ideas, and for those looking to expand their crafting repertoire, there are plenty of options for Custom Christmas Ornaments available.
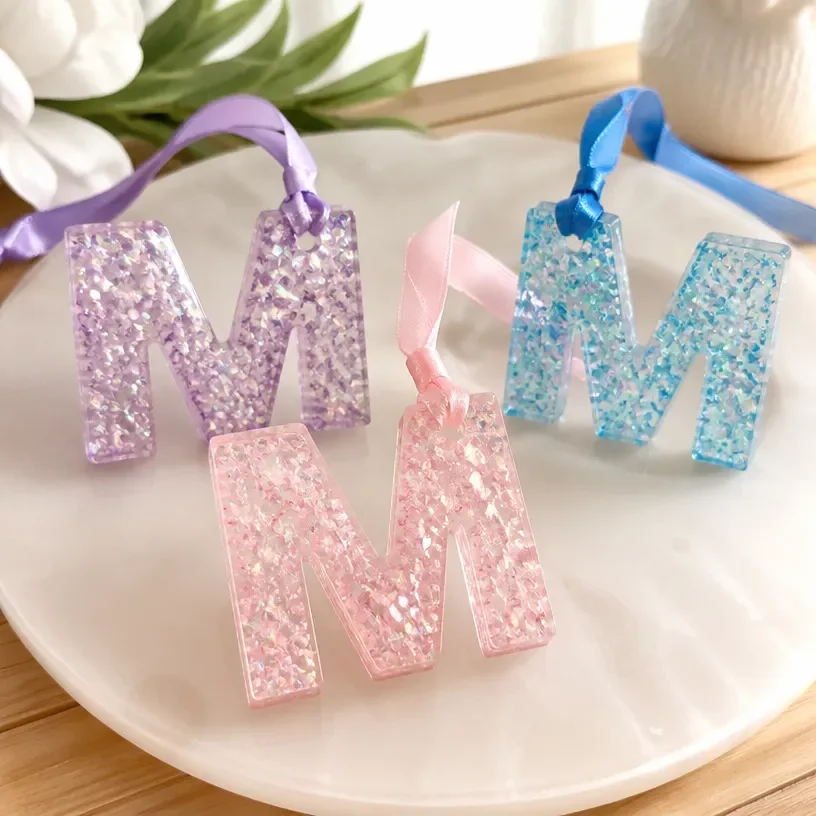
Personalized Crystal Monogram Ornament
Ingredients
Method
- Start by ensuring your clear acrylic ornament base is clean and free of any dust.
- Lay out your crystal beads and design, deciding on a pattern.
- Apply a small amount of transparent adhesive to the back of the printed monogram letter and place it on the acrylic base.
- Use tweezers to place the crystal beads around the monogram, securing them with adhesive.
- Trim any excess ribbon or twine to your desired length once everything is securely in place.



