
Floating Floral Frame Wall Art for Modern Home Decor
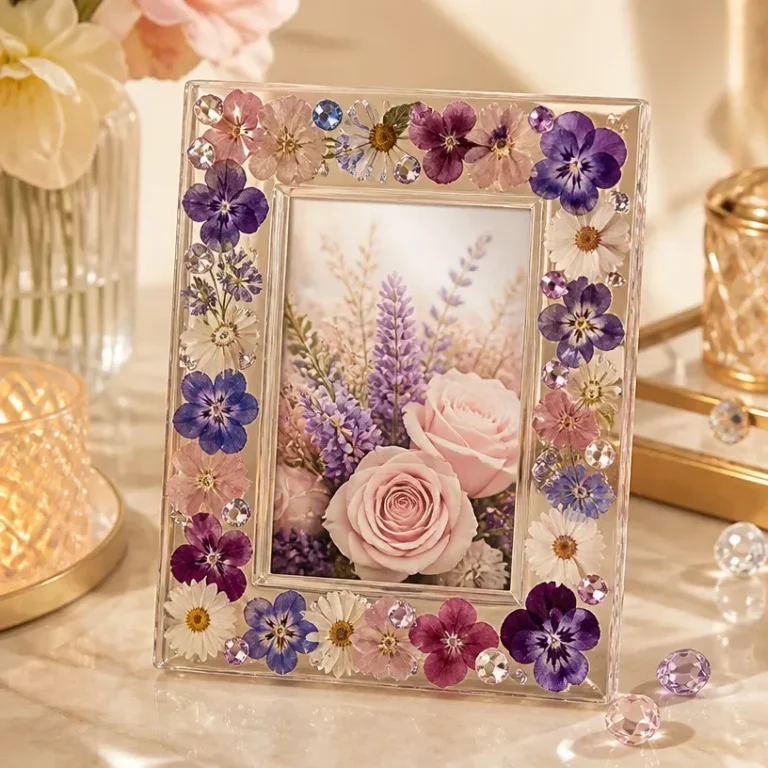
Creating a floating floral frame wall art piece is a lovely way to bring the beauty of nature into your home decor. This project not only showcases delicate botanicals but also adds a modern touch that fits beautifully in any space. It serves as an elegant wall display for your living room, bedroom, or even a hallway, adding charm and a personal touch to your environment. You may also find Diy Shimmering Rainbow Fern Wall Art Modern Home Decor useful.
This guide will take you step-by-step through the process of making your own floating floral frame wall art, ensuring that the outcome is as stunning as it is satisfying. Not only will you learn safe and effective techniques for crafting, but you can also personalize the materials to match your aesthetic. You may also find Diy 3D Flower Wall Art Fruit Foam Nets Home Decor useful.
Why You’ll Love This Project
Benefits of Floating Floral Frame Wall Art
- Visually Striking: The combination of pressed flowers and a transparent frame creates an eye-catching piece that draws attention.
- Customizable Design: You can choose various flower types, colors, and frame styles, allowing the art to reflect your personal taste.
- Inexpensive Materials: Most of the materials needed are affordable and easily accessible, making this project budget-friendly.
- Approachable Craft: This project is suitable for all skill levels, providing a rewarding experience whether you’re a beginner or a seasoned crafter.
- Seasonal Decor: You can update the art with different flowers or colors throughout the year, ensuring your decor always feels fresh.
Before You Begin
Before diving into the creation process, it’s essential to prepare your workspace and gather your materials. Make sure to protect your surfaces with a silicone mat or newspaper to avoid messes. Additionally, gather your botanicals pressed flowers work best, so ensure they are fully dried. You may also find Crystal Lotus Prism Mirror Frame Diy Elegant Home Decor useful.
Materials You’ll Need
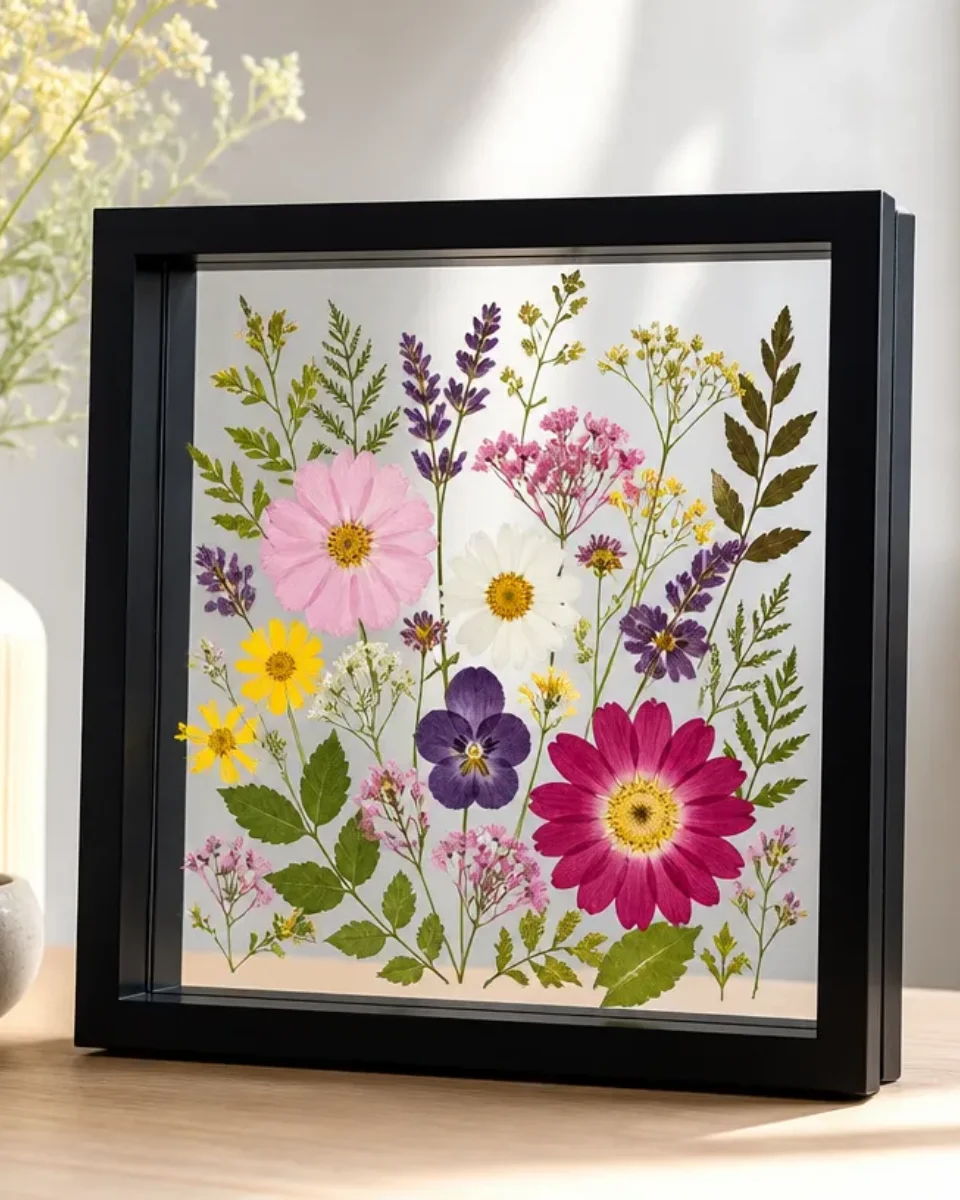
- Clear adhesive frame serves as the holding base for your floral designs.
- Pressed flowers select flat, dried flowers that will fit nicely within the frame’s dimensions.
- Decorative elements (optional) such as ribbons or small crystals to enhance the look.
- Adhesive glue to secure the flowers in place.
- Scissors for trimming flowers if necessary.
Tools
- Craft knife for precision trimming of botanical pieces.
- Ruler to measure and ensure even placement of flowers.
- Tweezers helpful for positioning delicate flowers.
How to Make the Project
Step 1: Arrange the Pressed Flowers
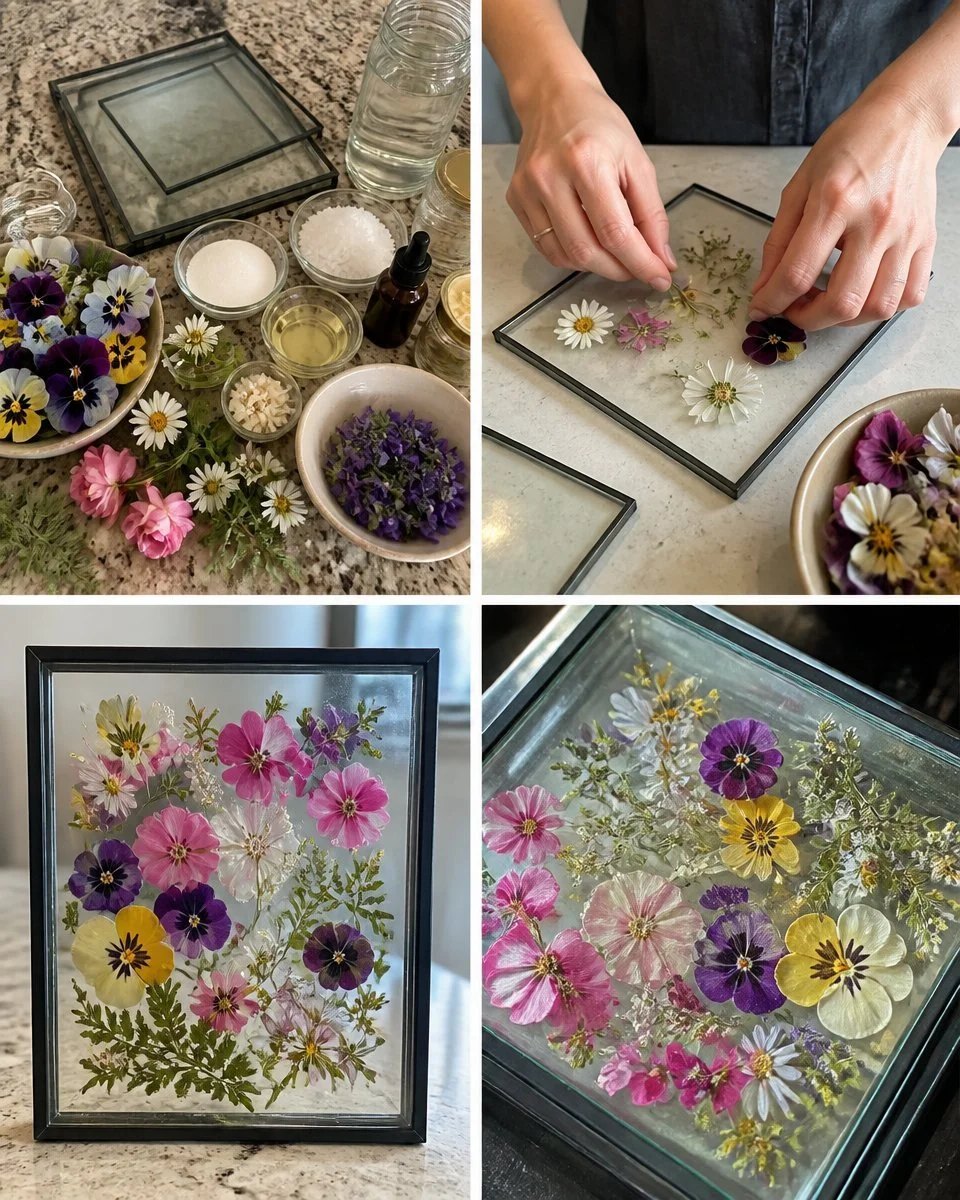
Begin by selecting and arranging your pressed flowers inside the adhesive frame. Take a moment to experiment with different layouts until you find one that pleases your aesthetic.
Step 2: Secure the Design
Once you have the desired arrangement, use adhesive glue to secure the flowers in place. Be sure to use enough glue to ensure they are firmly attached, but avoid excess that could seep out.
Step 3: Assemble the Frame
Carefully place the frame’s glass over the arranged flowers. Make sure everything is perfectly aligned before sealing it shut.
Step 4: Final Touches
Add any decorative elements if desired; this could include small crystals or ribbons tied around the frame. Allow the glue to dry completely before hanging your beautiful new piece.
Tips for the Best Result
- Choose the Right Flowers: Opt for flowers that retain their color well when dried. Consider seasonal options for a thematic look.
- Remove Excess Glue: To avoid a messy finish, clean off any excess glue immediately after applying it.
- Hang at Eye Level: When displaying your piece, hang it at eye level to make it the center of attention.
Customization / Variations
You can create infinite variations of this floral wall art by using different types of flowers and frames. Consider seasonal colors, changing flowers based on the month, or even adding beads of various hues for a personal touch.
Ideas for Styling Your Handmade Decor
Floating floral frame wall art can enhance a wide variety of spaces. It looks stunning above a console table, in a gallery wall setting, or even in a nursery. Pair it with other DIY projects like a 3D floral wall art or a coastal glass vase for a cohesive look.
Frequently Asked Questions
Can I use fresh flowers instead of pressed ones?
Fresh flowers typically wilt and deteriorate, but if you wish to use them temporarily, consider changing them out regularly for the best visual impact.
What are the best flowers to press?
Flowers that are flatter and more delicate, such as pansies or violets, tend to press well and maintain their color.
How do I care for my floating floral frame?
Dust gently with a soft cloth to keep it clean. Avoid placing it in areas of high humidity, which could affect the flowers over time.
How do I hang the frame securely?
Use picture hanging strips or hooks that match the weight of your frame. Ensure it’s securely anchored into the wall.
Conclusion
In creating your floating floral frame wall art, you’ve crafted a unique piece that beautifully combines nature with modern decor. This stunning art piece not only enlivens your space but also offers the opportunity for endless customization. To enhance your decor even further, consider adding wall art from other sources such as large framed canvas wall art or vintage floating frame wall art for a well-rounded look.
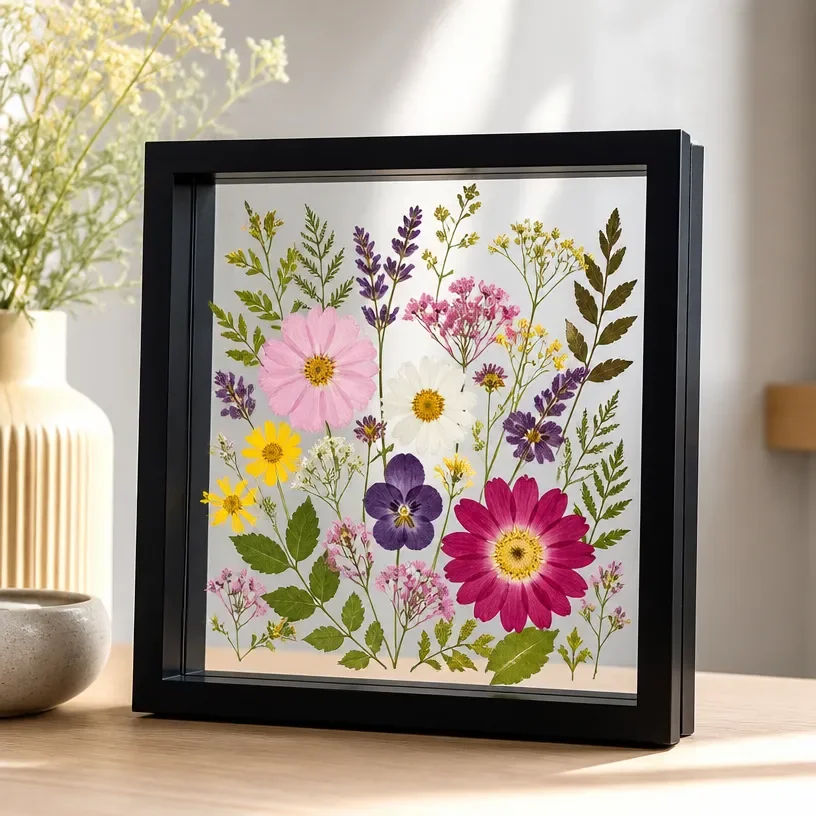
Floating Floral Frame Wall Art
Ingredients
Method
- Step 1: Arrange the Pressed Flowers - Begin by selecting and arranging your pressed flowers inside the adhesive frame. Experiment with different layouts.
- Step 2: Secure the Design - Use adhesive glue to secure the flowers in place, ensuring firm attachment without excess.
- Step 3: Assemble the Frame - Carefully place the frame's glass over the arranged flowers and align it before sealing.
- Step 4: Final Touches - Add any desired decorative elements and allow the glue to dry completely before hanging.